Hello World: your first Web App with Angular
Step 1 : Install Wakanda
First, download and install Wakanda Enterprise Edition
Now we can start our HelloWorldWeb project.
Step 2: Choose : mobile or web app ?
We can choose the kind of app we want to create : mobile, web or both.
Here we want to create an Angular web app.
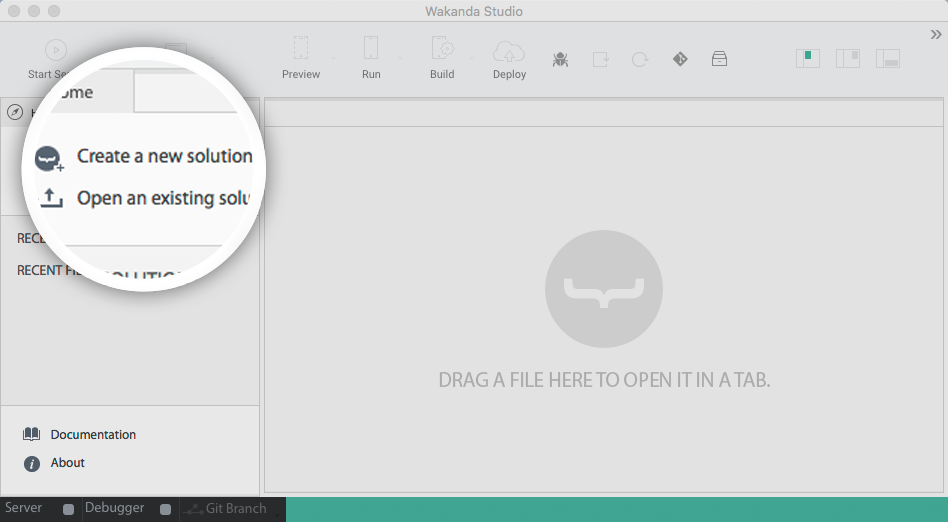
To do that, we’re going to open the studio ![]() , and click on “Create a new solution”:
, and click on “Create a new solution”:
Which opens the template selection page:

Now, a solution and a project structure have been created. A solution, represent your whole app and can contain multiple projects. The first one is created by default.
The structure of your project depends of the template you choose.
You’ll always have the same back end structure, but you can choose to have a web front-end and/or mobile front-end.
There, you can name your app - without spaces - and select the Angular basic template.
Now, in your HelloWorldWeb project, you can find the Angular web app file structure :
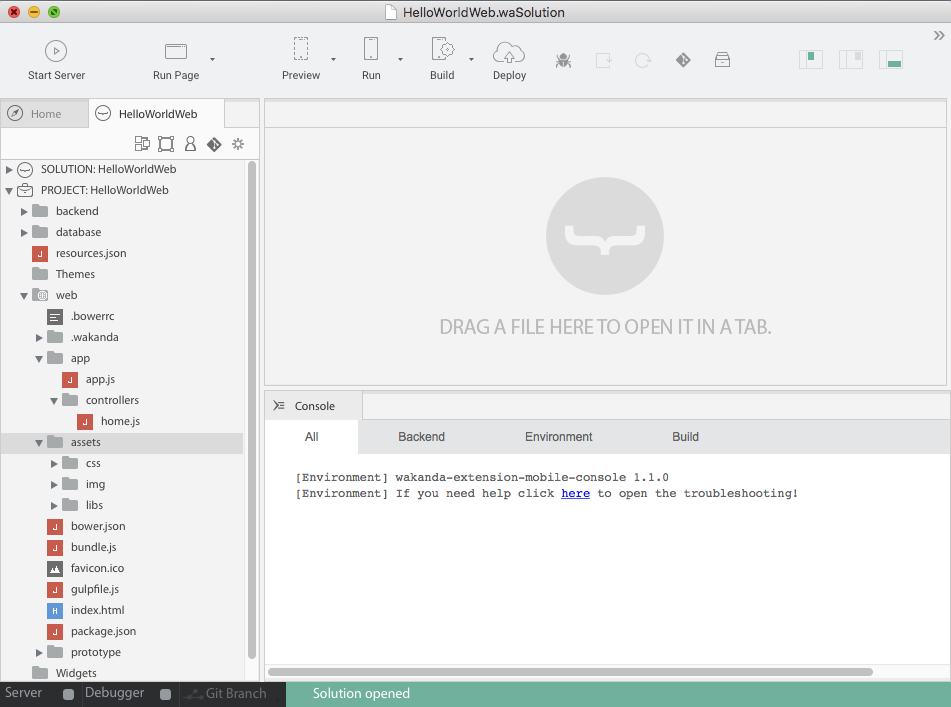
You have 3 folders at the root of your project:
- Backend: Wakanda JavaScript Server. It contains all the Server files to logs, settings, permissions.
- Database: Wakanda DB folder. It contains your data model(s), backups and your data.
- Web: where you’ll find all your web app front-end files. It contains all you need to code your Angular 1 or 2 projects.
TIPS:
- If you choose web and mobile in the template selection, you’ll have both a
mobileand awebfolder.- A mobile and a web front-end, for the same back-end.
Note : Prototyper folder in the Web Project is a prototyper tool to create quickly Web UI based on widgets architecture. But it is deprecated and will be excluded from the platform in our next major release.
For our HelloWorldWeb we’re going to work first in the web folder.
Step 3: Run your web application
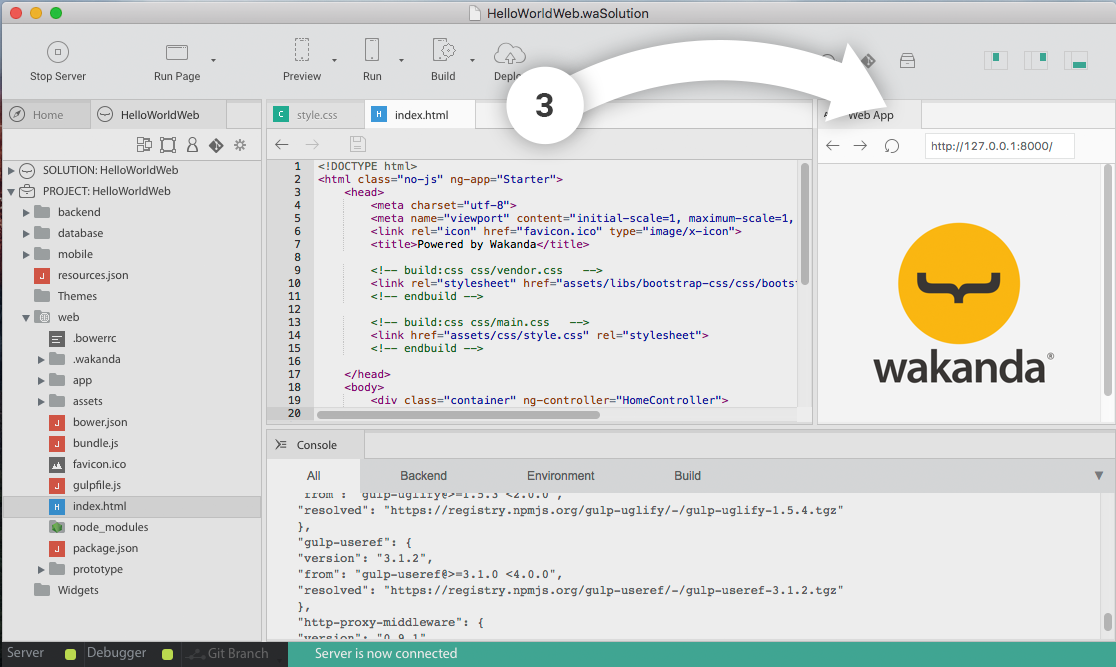
First let’s have a look to our web template.
Click on the Run Page toolbar button:

TIPS:
- To open your application in your default browser, set this preference via Run Page dropdown
- Customize the panels: open the right panel from the toolbar toggles
- You can move the web preview on the right panel

Step 4: Code your Angular application
Let’s have a look to our project structure : in the web folder, as for a classical Angular app file structure, you have the index.html file and folders app and assets at the root.
index.html handles loading in all the libraries and Angular elements
assets is very standard: it contains all the shared assets as css, images, libs
app is the core of your app. It contains all your controllers.
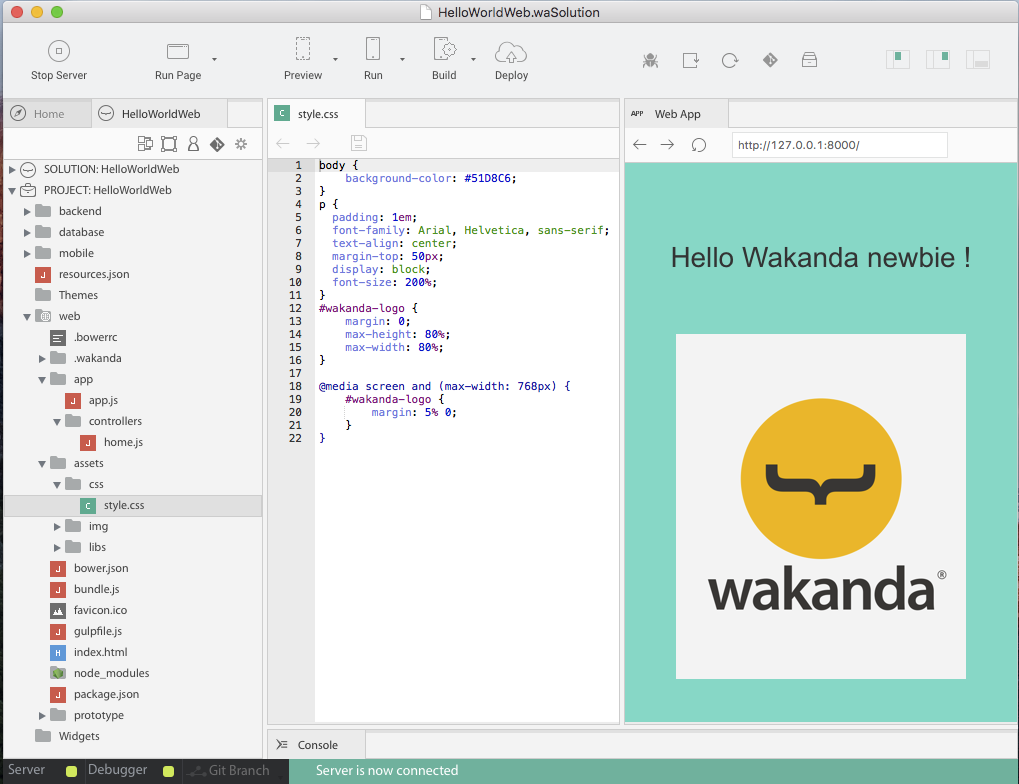
A simple change in web/index.html and I have my HelloWorld done.
To make it more visual, you can change the background color in its css file web/assets/css/style.scss:
body {
    background-color: #51D8C6;
}
p {
  padding: 1em;
  font-family: Arial, Helvetica, sans-serif;
  text-align: center;
  margin-top: 50px;
  display: block;
  font-size: 200%;
}
The preview is automatically reloaded after each saving.